Training Tips
![]()
Office 365 Groups
Groups are the new and improved option in Office 365 for sending e-mails to multiple people. They replace Contact Groups (formerly known as Distribution Lists) and also include powerful collaboration features.
Use Groups in Office 365 to collaborate with and easily set up a collection of resources with Stockton users to share. Adding members to the group automatically gives them the permissions they need to the tools your group provides.
The instructions below will show you how to create Groups in Outlook.
- Open Outlook 2016.
- Do one of the following to start a new Group:
- Outlook 2016 Client. Select Home > New Group.

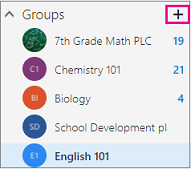
- Outlook on the Web. In the navigation pane (left), below your Folders, next to Groups, select the + button. (If you have a long folder list, you'll need to scroll down until you see Groups.)
- Outlook 2016 Client. Select Home > New Group.
- Fill out the group information.
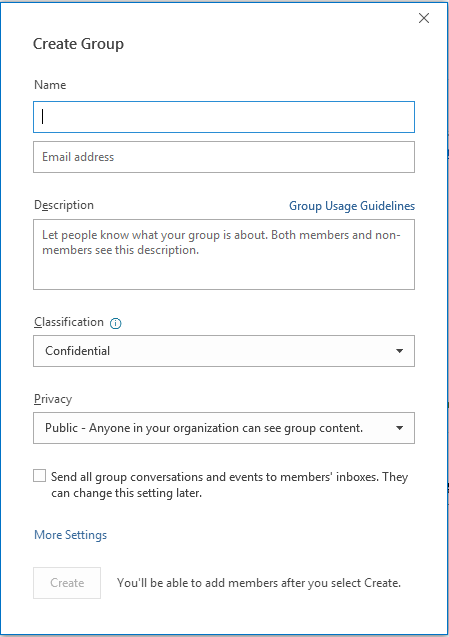
- Group name: Create a name that captures the spirit of the group.
- Once you enter a name, a suggested email address is provided. "Not available" means the group name is already in use and you should try a different name. Note that once you choose a group name, it cannot be changed.
- Description: Optionally, enter a description that will help others understand the group's purpose. This description will be included in the welcome email when others join the group.
- Classification: Choose a classification. Options available depend on what your organization has set up.
- Privacy: By default, Groups are created as Private. This means only approved members in your
organization can see what's inside the group. Anyone else in your organization who
is not approved cannot see what's in the group.
- Select Public to create a group where anyone within your organization can view its content and become a member.
- Select Private to create a group where membership requires approval and only members can view group content.
- Send all group conversations and events to members' inboxes Optionally, check this box to enable members to see all group conversations and events in their inbox without having to visit separate group workspaces. Members can change this setting for their own mailboxes.
- Select Create.
You can now use your Group in an e-mail just like a distribution list
Add Members to your Groups
- Your Groups are accessible from your Folder List. Just scroll down to Groups and click on the arrow to expand it.
- Select your Group
- On the Groups ribbon, select Add Members

- In the Add Members dialog box, under Add people, search for the new member and click on his/her name to add the account to the Members list
- Click on OK when finished
Remove Members from your Groups
- Your Groups are accessible from your Folder List. Just scroll down to Groups and click on the arrow to expand it.
- Select your Group
- On the Groups ribbon, select Add Members
- Under Members, point at the person's name and click on the X to the right
- Click on OK when finished

Previous Tips