Training Tips
![]()
Advising Scheduling with Calendly
Calendly is a free service that allows users to build online sign-up sheets and share them with a URL. During the sign-up process, Calendly can be linked to an Office 365 e-mail address and sign-up sheets can feed directly into an Outlook calendar.
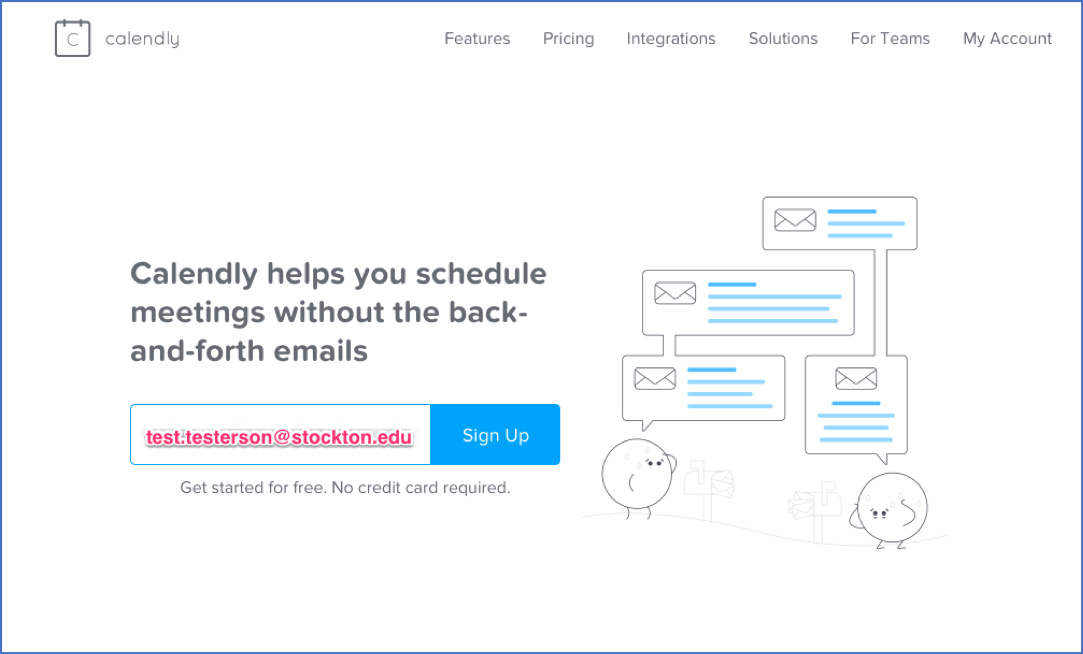
In this example, we’ll be signing up for a Calendly account with an existing @stockton.edu e-mail address and creating a precepting sign-up sheet with 15-minute appointments happening between 11 AM and 4:30 PM.
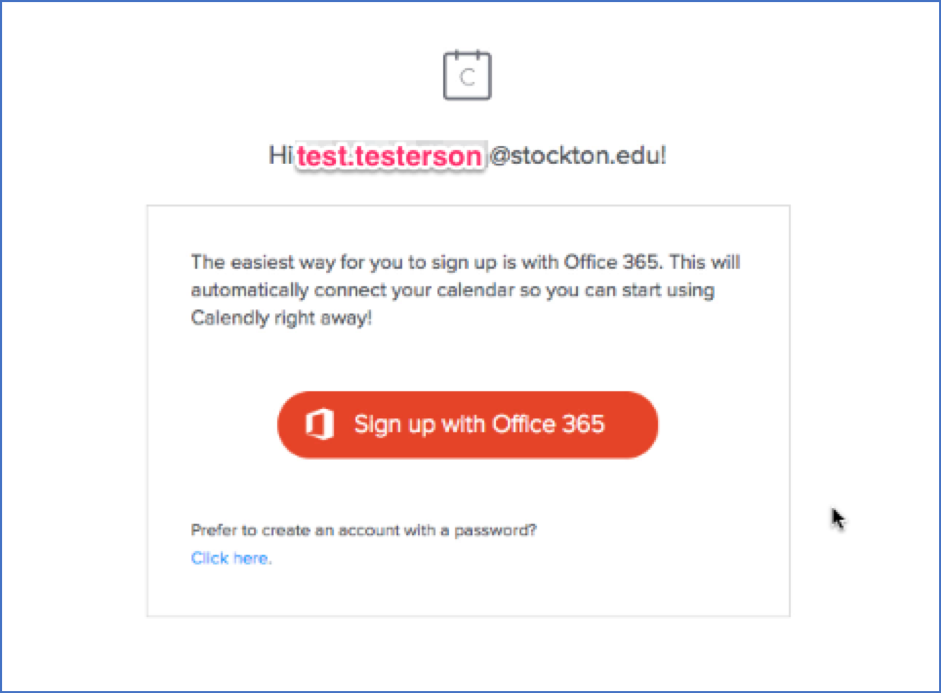
To begin, open your web browser and navigate to calendly.com. In the sign-up field, enter your stockton.edu e-mail address. Click “Sign up” and then “Sign up with office 365” to proceed.
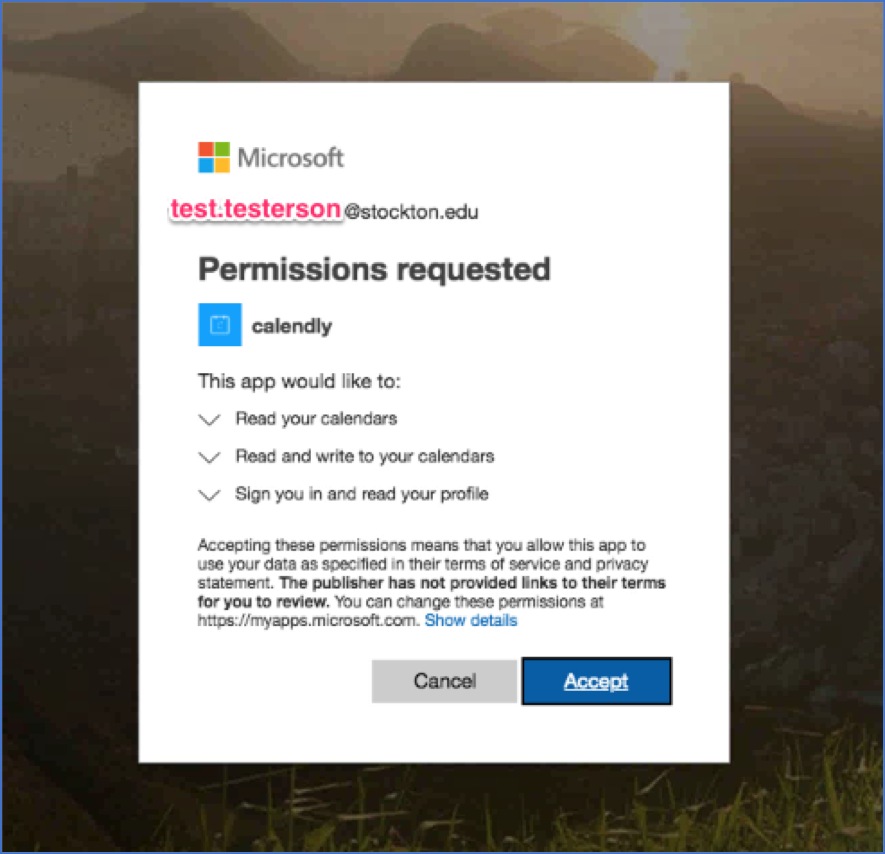
To automatically add appointments into your Outlook calendar, Calendly will request several permissions for your Office 365 account. Click “Allow” to proceed.
Having completed the account creation process, you’ll be asked to choose your calendar URL and your Time Zone. Click “Next” to proceed.

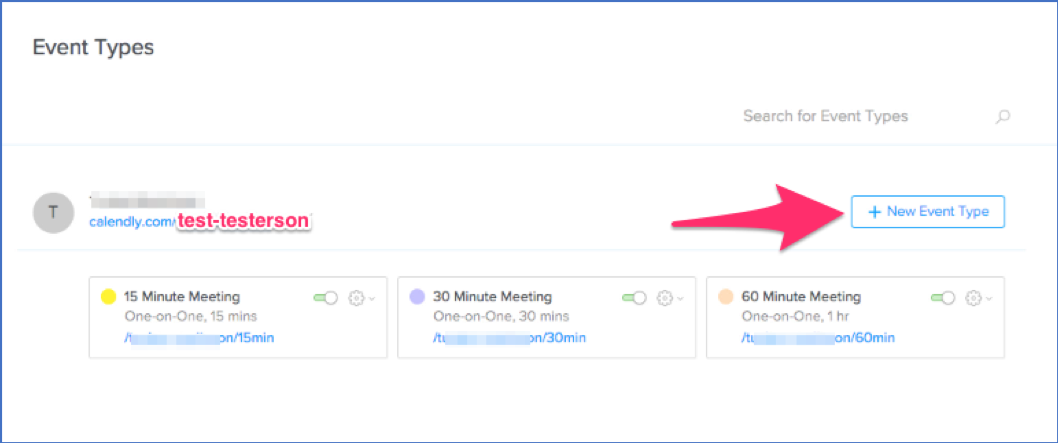
Calendly will start you off with several event sign-up pages, but let’s begin by creating a custom sign-up page specifically for precepting.
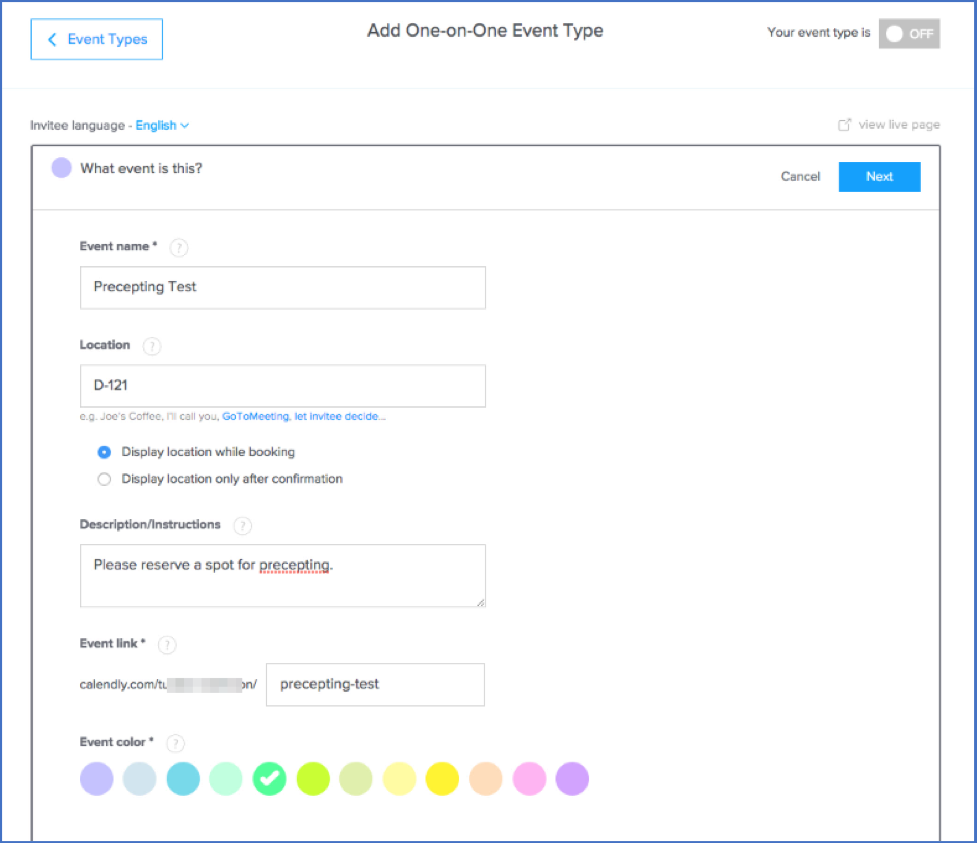
Enter the details for your event, including a name, location, and a description of the event. Click “Next” to proceed.
Under “When can people book this event?” choose an event duration, then edit the “Date Range” option. To schedule one specific date, choose “Over a date range” from the drop-down menu, then choose a single day on the calendar displayed below. Click “Apply” to proceed.
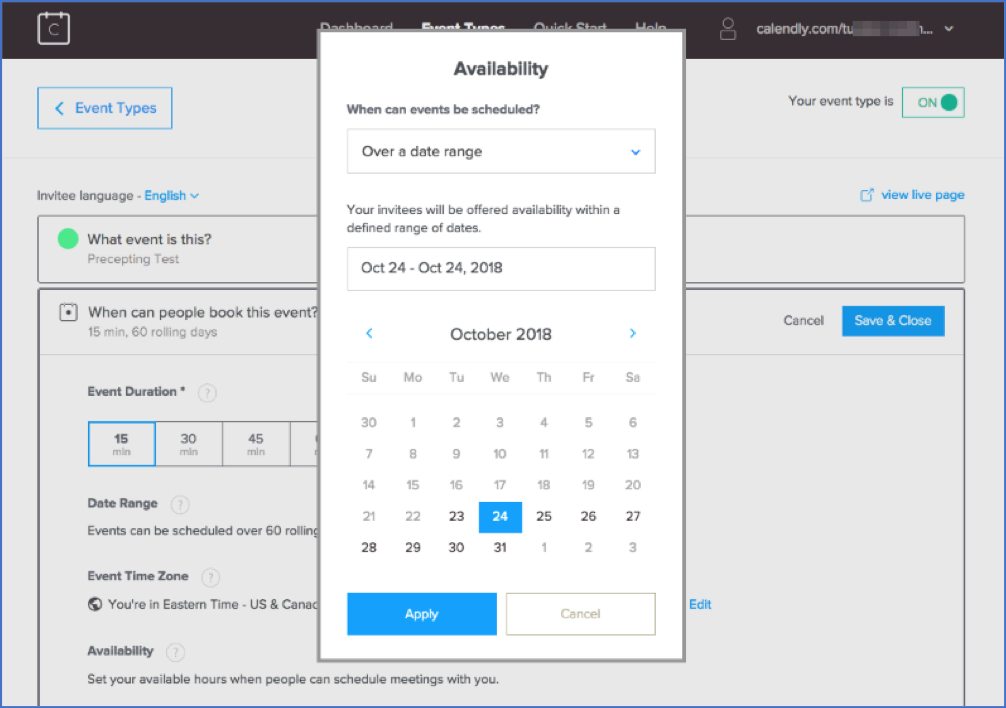
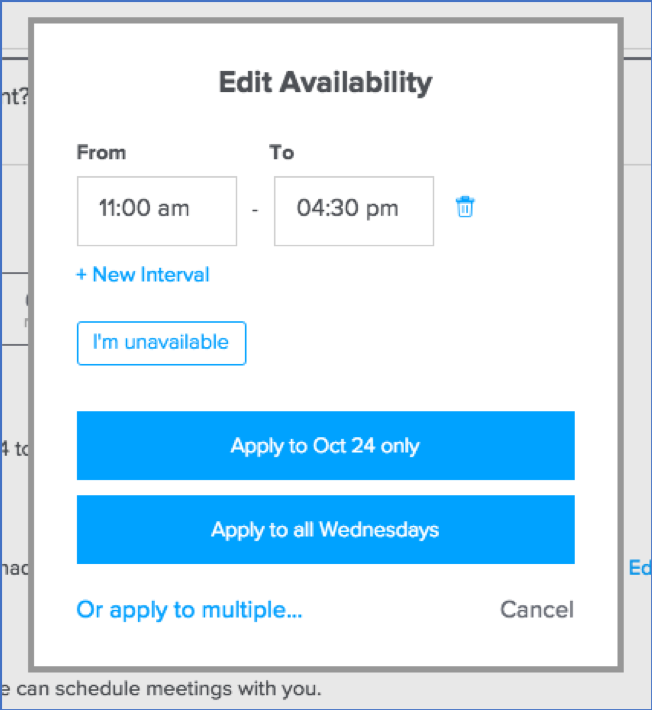
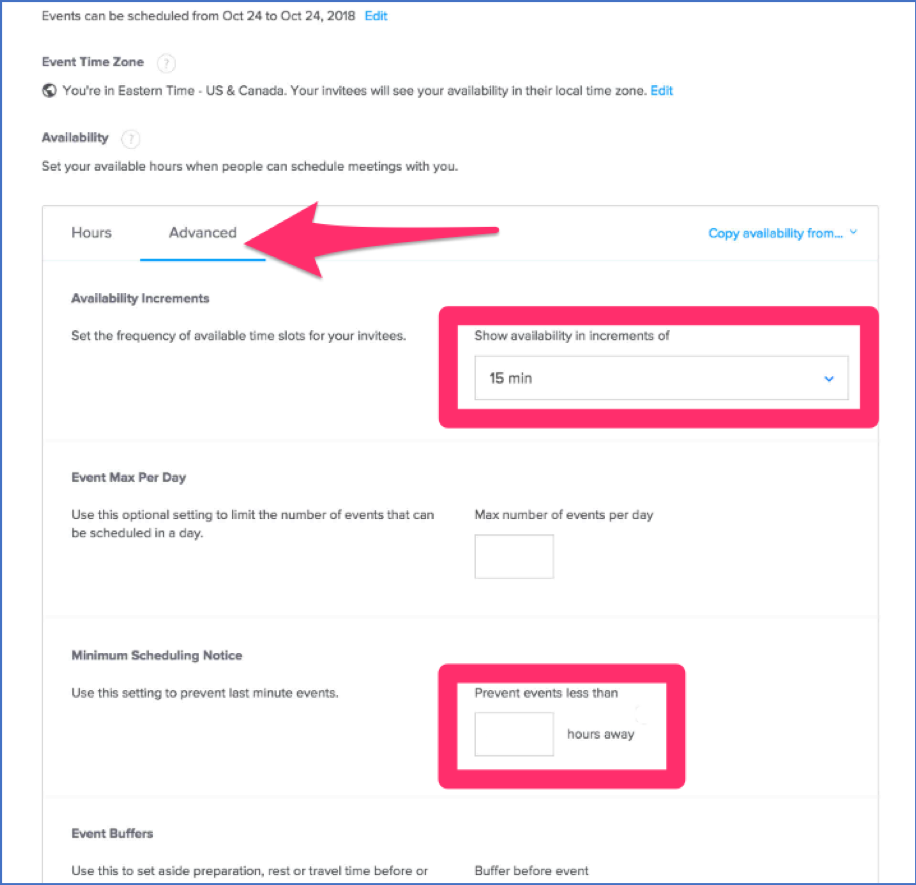
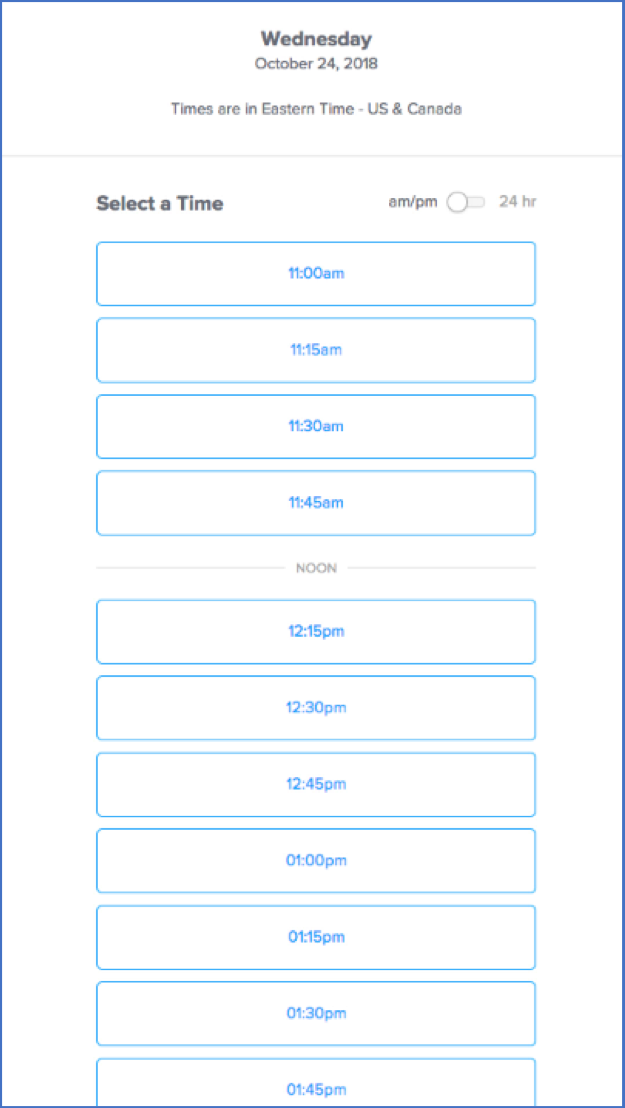
Next, under Availability, click on the date you’re scheduling to establish what hours you’ll be available.
In the “Availability” section, click on the “Advanced” tab to set the availability increments. This setting controls how many appointment slots to create and operates independently of the Event Duration option. Next, choose a Minimum Scheduling Notice, this prevents appointments from being scheduled without adequate notice. If you wish to allow students to schedule appointments up until and including precepting day, set this value to 0. Click “Next” to proceed.
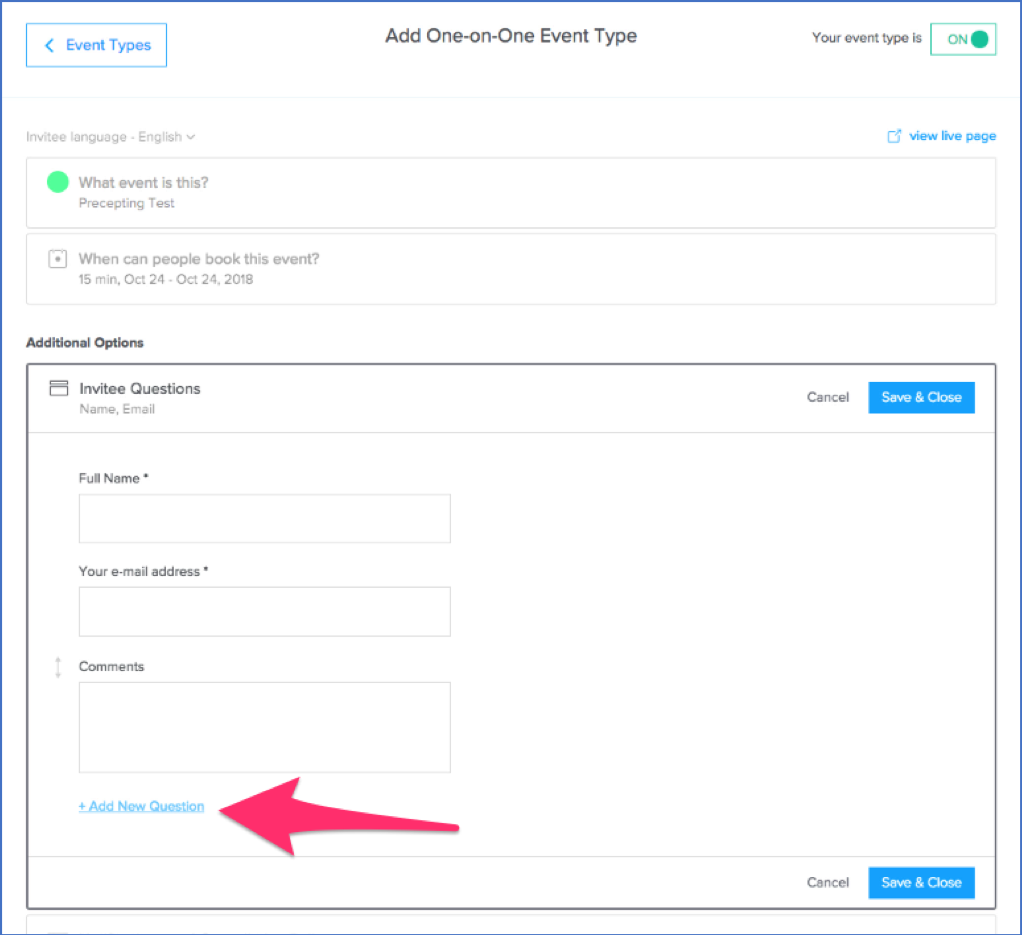
Next, we’ll complete the Additional Options section. While these can be left at their defaults, some of these features significantly enhance the information you can gather at the time of scheduling and the options students have for notifications.
The “Invitee Questions” menu allows you to ask questions at the time of scheduling, such as a Comments field or checkboxes. By default, invitees are only asked for a name and e-mail address. To add questions, click on “Add new question”. Click “Save & Close” after you’ve finished adding questions to proceed.
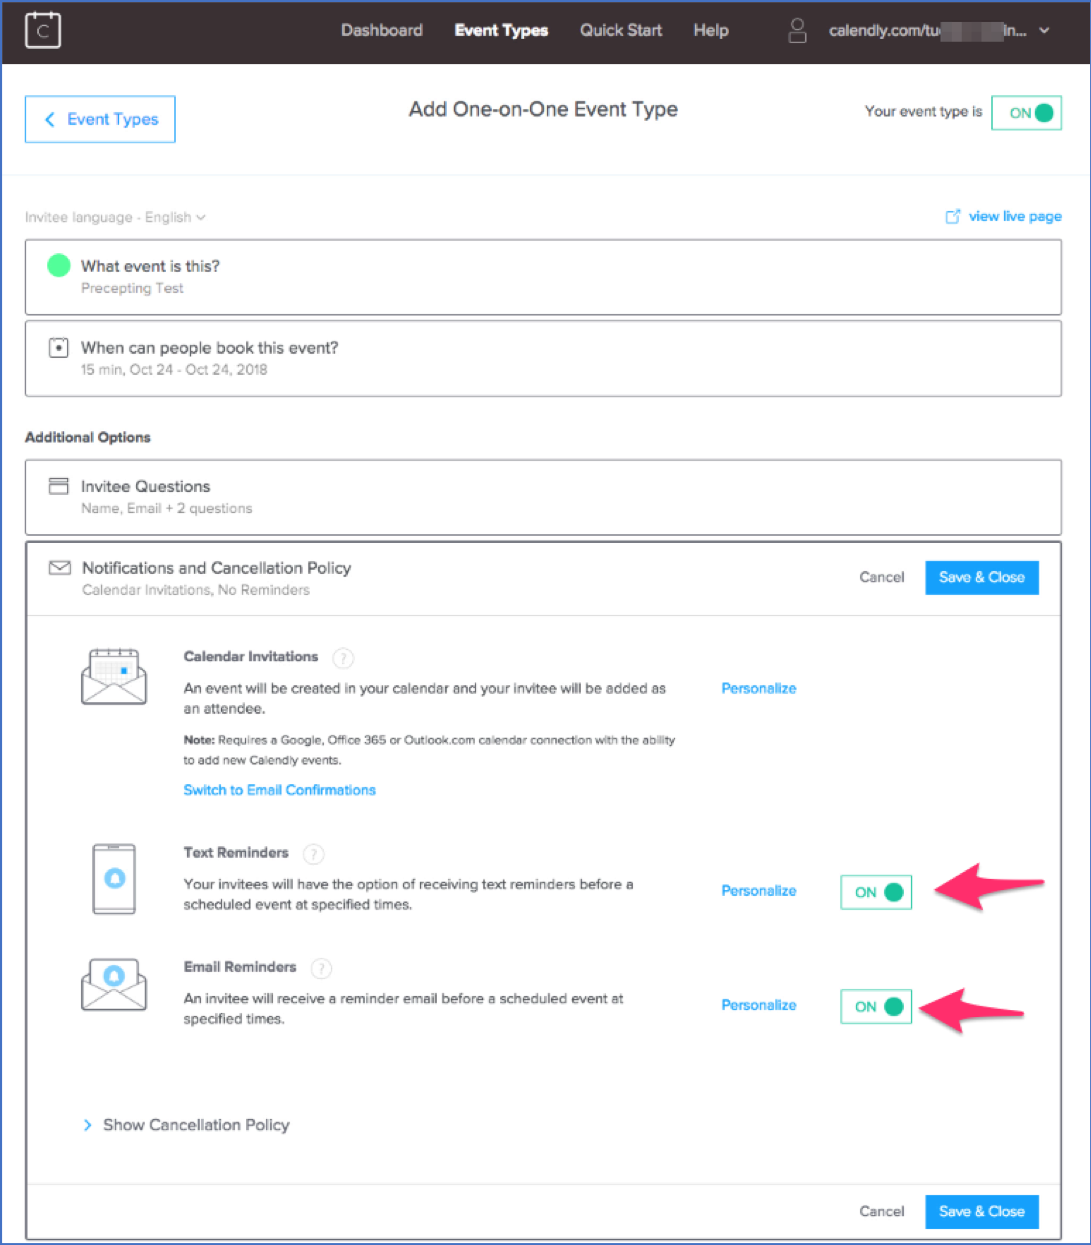
Under “Notifications and Cancellation Policy” you can allow invitees to receive text and e-mail reminders of scheduled appointments. These are inactive by default; however, students may benefit from them being enabled.
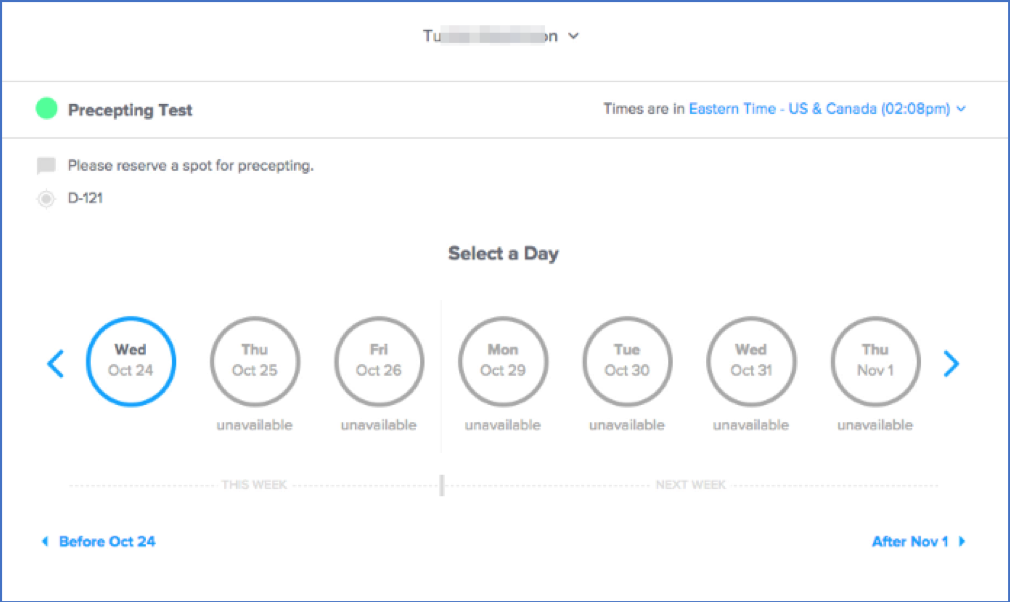
Your Calendly Precepting Event is now ready to be distributed. Click on View Live Page to see the scheduling interface.

This is the interface students will use to schedule appointments. Copy the URL from your address bar to distribute to students via Blackboard Advising Sections or e-mail.
Upon choosing an appointment slot, invitees will be asked to submit a name, e-mail address, and any additional information requested in the “Invitee questions” menu. If you have allowed text notifications, a field will appear for invitees to enter a phone number.
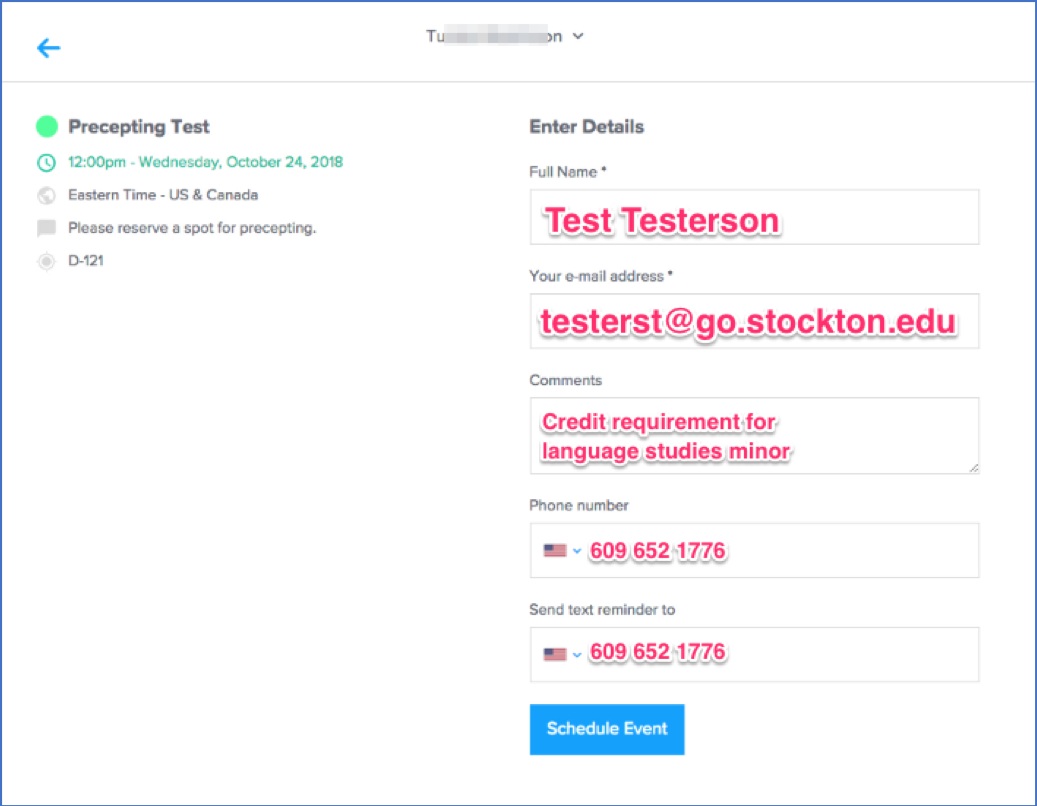
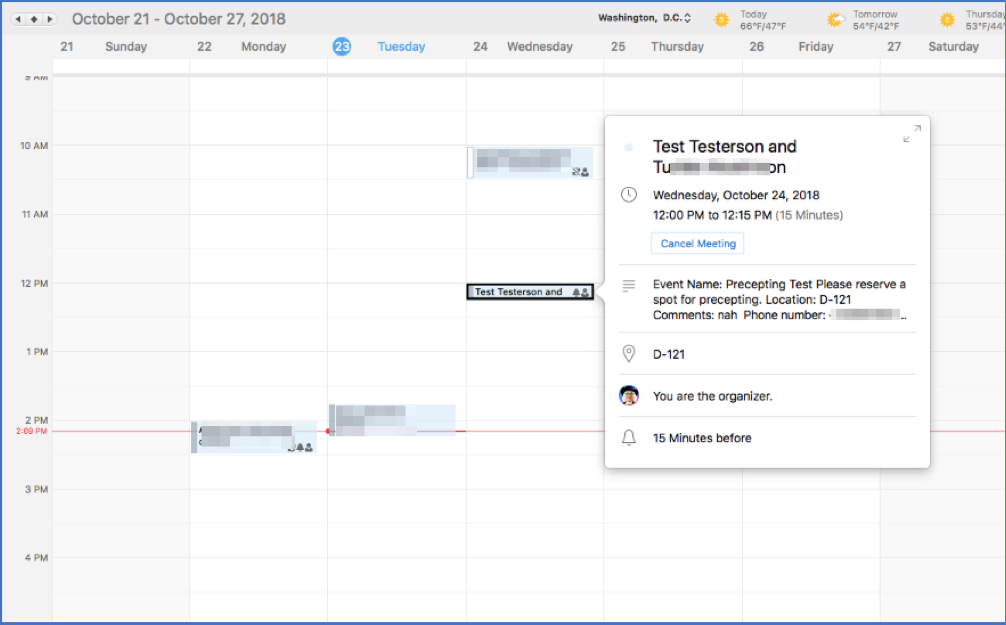
Once an appointment has been scheduled, an Outlook event will appear in your calendar including any details entered by the invitee.