Appointment Scheduling with Microsoft Bookings
Microsoft Bookings is an online platform that allows users to make appointments with the calendar's owner. Once set up, appointments can be made on a handy web page that can be distributed through e-mail, Blackboard, or any messaging app. Bookings is fully integrated with the Microsoft Office 365 suite, so any appointments made will appear in your Outlook calendar.
Although Bookings and Bookwithme are both published by Microsoft, they serve different functions: Bookings is designed to be used by users external to the Outlook ecosystem, while Bookwithme is designed to be used in concert with Outlook. Students' accounts do not have access to Outlook, and due to this Bookwithme will encounter errors and return an incomplete record when students attempt to make appointments. We recommend using Bookings for any situations where students will make appointments.
Choose Your Calendar
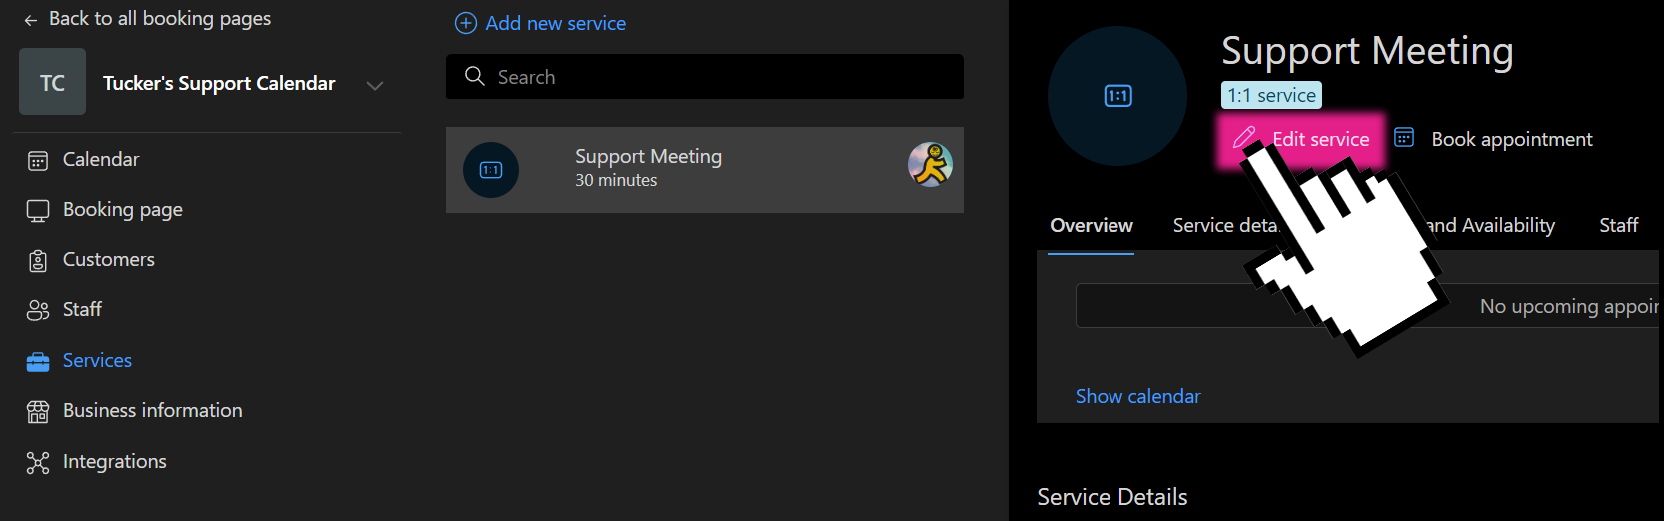
If you do not have a Bookings Calendar, start by creating a new Bookings calendar. If you do have a Bookings Calendar, it’s best to use the existing one. In your Bookings calendar, click over to the Services tab and create or modify an existing service. Most advising calendars use two separate services for the first and second advising days, this makes it harder for students to accidentally choose a day unavailable to them.
Appointment Details
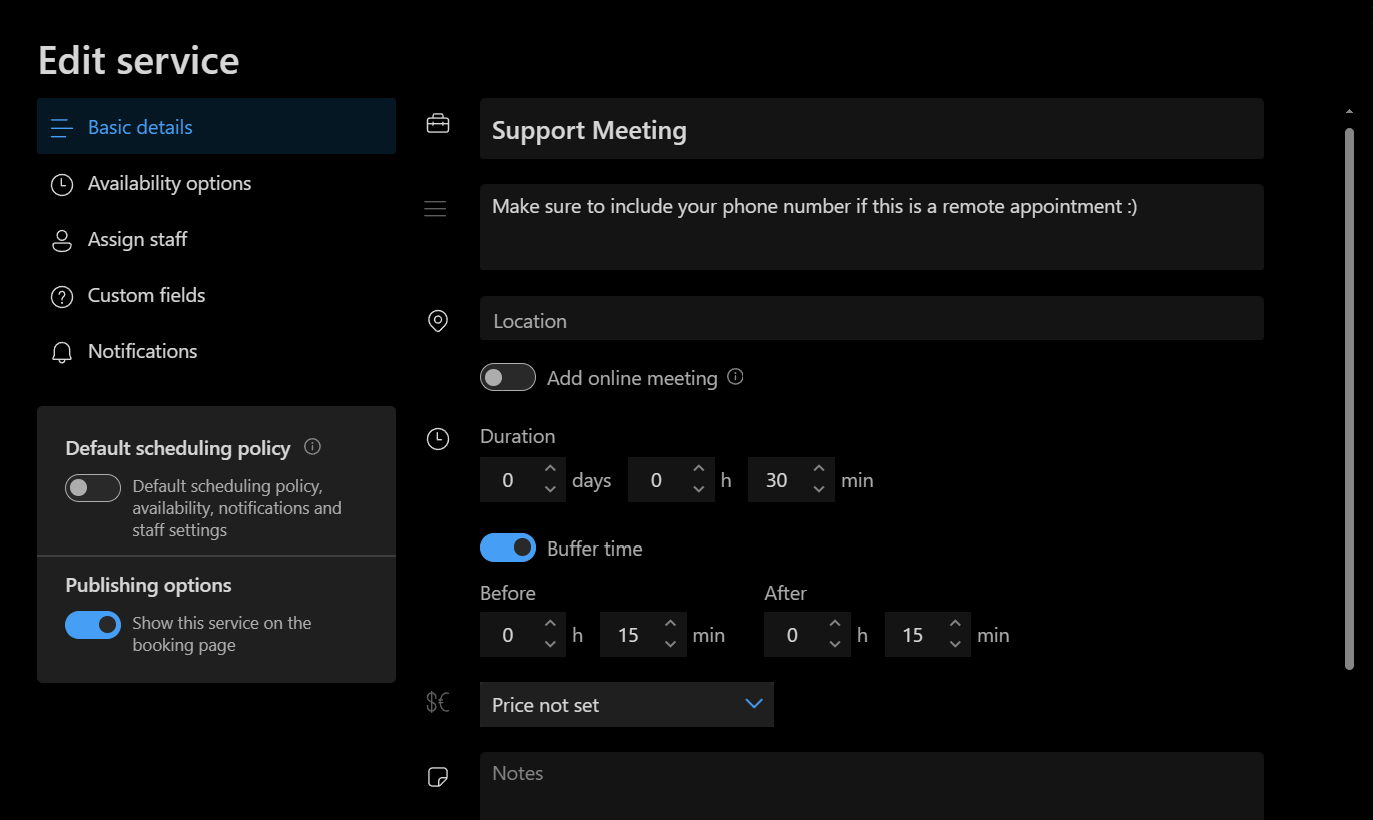
When editing each service, first set its name and duration. If you’re meeting in-person, put your office number under Location; if you’re meeting online make sure to provide a link to a Zoom or Teams session.
Set Your Schedule
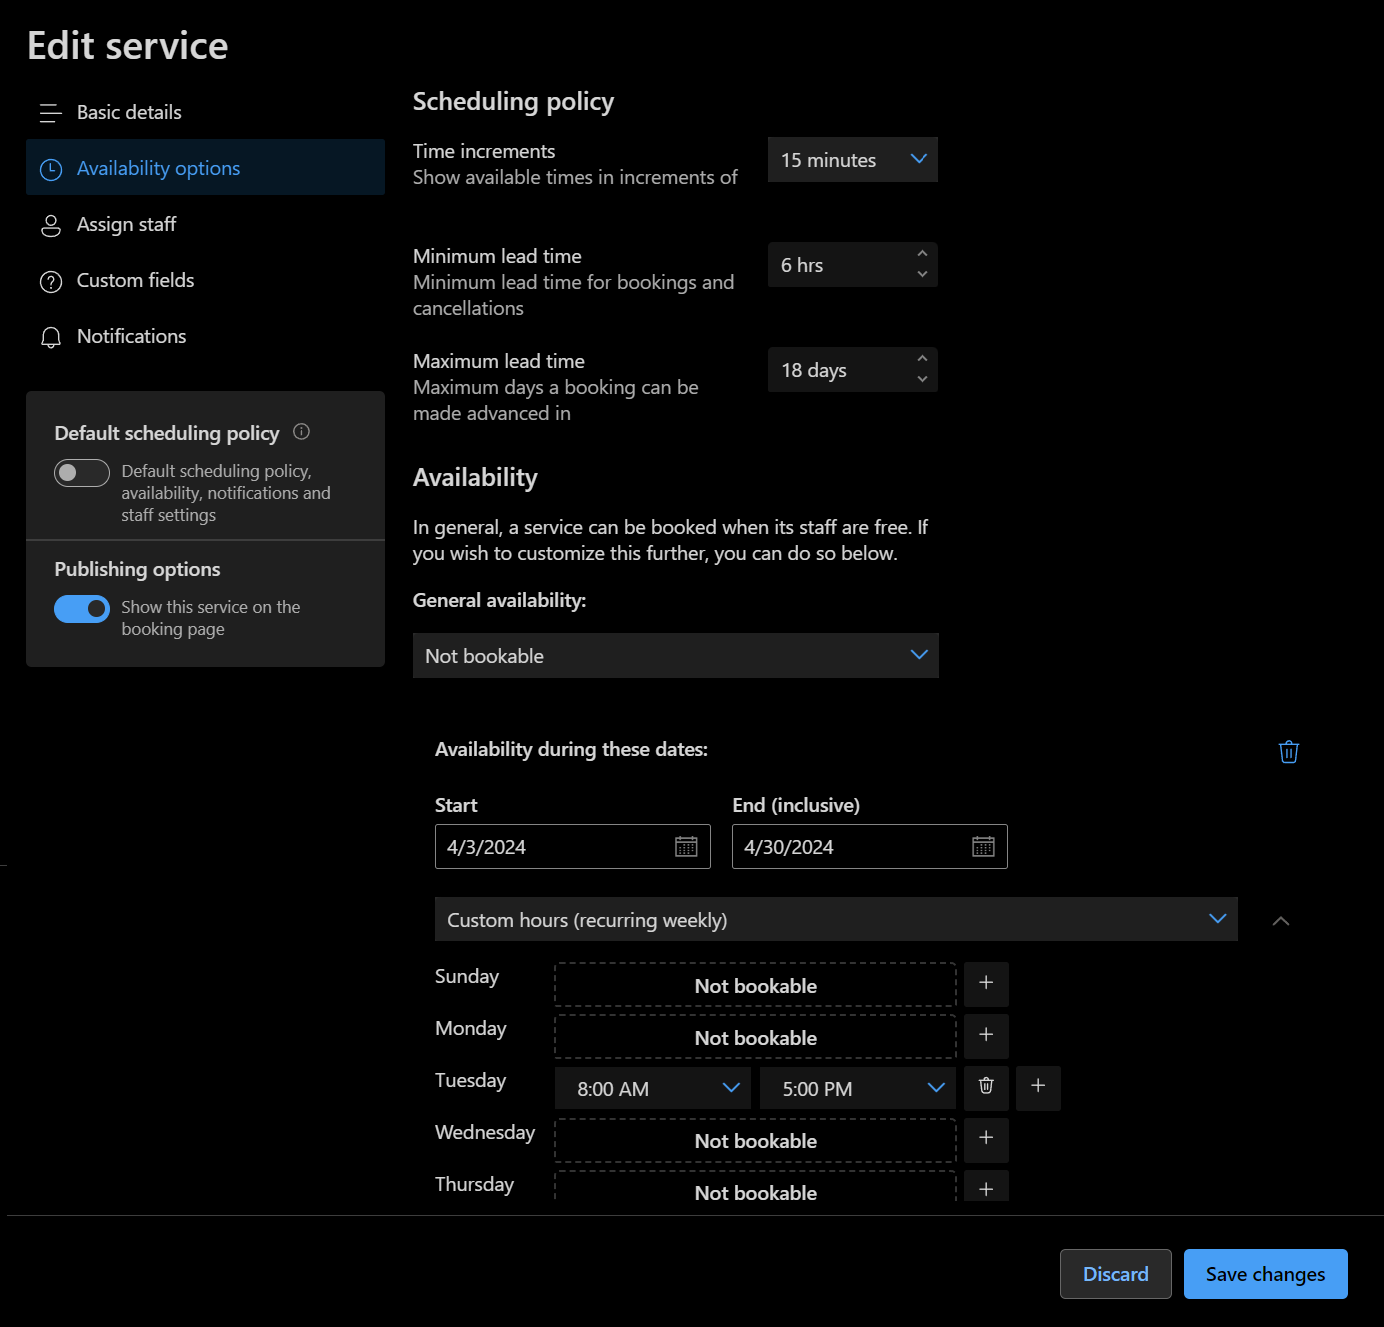
Under Availability Options, your Time Increments should match your Duration. Setting Lead Time tells the calendar how far in advance students may book an appointment. General availability should be set to Not Bookable, then use the “Set Different availability” button to set up a range of time on one advising day. Click on Save Changes to finalize your settings for this service. Repeat this for as many services as you need.
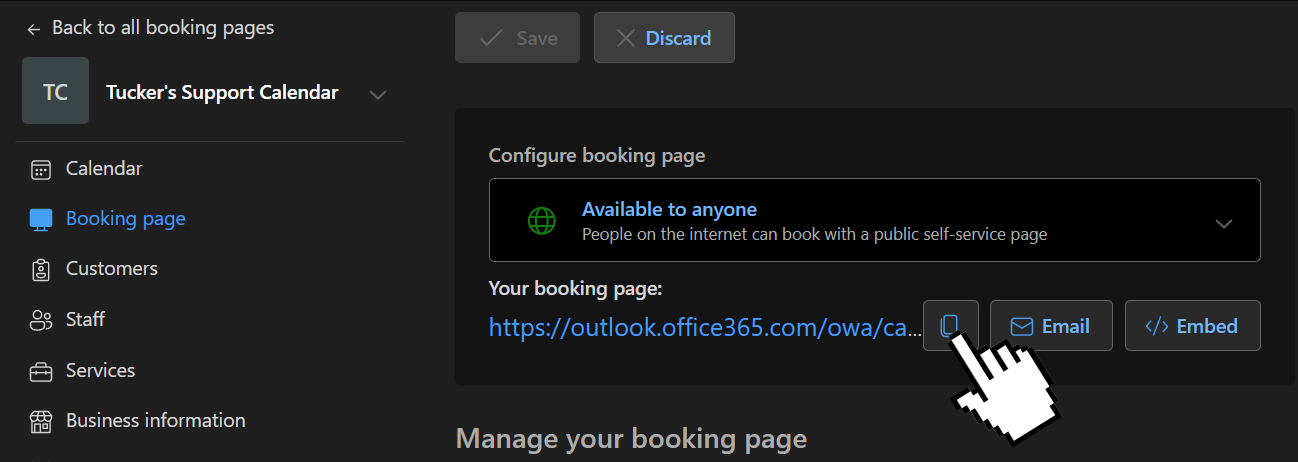
Share Your Page
To retrieve and test your shareable link, click on the Booking Page tab. From here you can view your Bookings page as students will see it, it; you may also copy your link to share over e-mail or post in your Blackboard advising section.
Need Help?
If your Bookings page doesn’t show the appointments you expect it to, check your outlook calendar and remove any existing events that occlude your advising hours. If you have any issues not solved this way, please contact the ITS Help Desk at 609-652-4309.
While Bookings is for the most part a move-in-ready experience, it’s possible to make it a little more personal using these features:
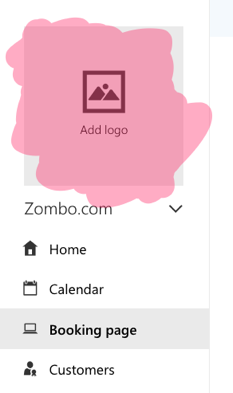
Adding a logo
To add an image to the top of your Bookings page, click on the “Add logo” button at the top of the Bookings navigation menu.
Click on “Upload a new logo” to select an image from your computer or device, then use the zoom and rotation functions to make any necessary changes to the image’s positioning. Click Save when you’re ready to finalize your logo.
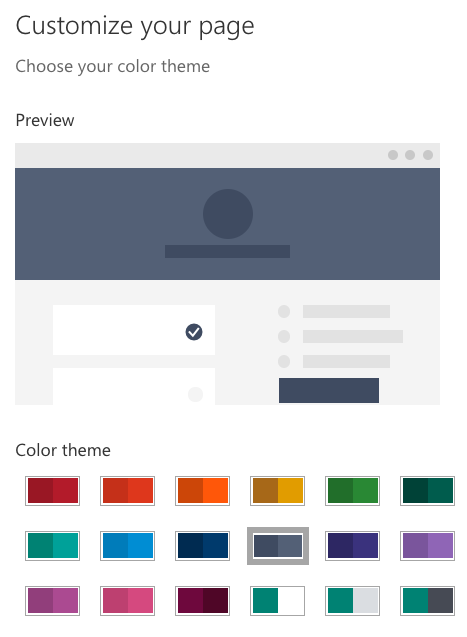
Setting a color theme
Navigate to the “Booking Page” menu, and you’ll be able to access the color palette for your Booking page. Select a color scheme to preview it, then click “Save and Publish” at the top of the page when you’ve chosen your favorite look.